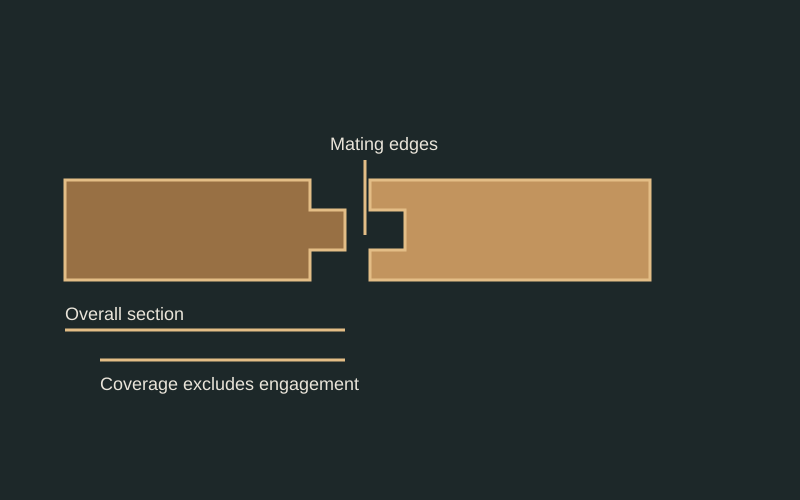
- The complete section includes its mating edge.
- Tongue engagement or lap changes the installed coverage.
- These family sections have no verified machining dimensions; obtain the supplied drawing.
Use an end view
A face photograph conceals the most important parts of a tongue-and-groove section. Obtain an end view or a dimensioned drawing. Label the tongue projection, tongue thickness, groove opening, groove depth, and the distance from each feature to the intended face. Preserve the drawing's units and orientation so the mating edges cannot be accidentally reversed.
Separate mating fit from appearance
Two boards may engage while their visible faces sit at different levels. Record the relationship between the tongue and each face, then compare the assembled shoulders. Note bevels, reliefs, and face offsets independently. Decide which features must align with an existing installation and which may be acceptable as part of a deliberate transition.
Ask where the assembly belongs
Identify whether the product is proposed for a wall, ceiling, sheltered porch, or another application. The profile name alone does not answer whether that exposure is appropriate. USDA's Wood Handbook treats moisture and dimensional behavior as material considerations. Have the project detail address the actual environment instead of assuming an interlock makes a water-managing assembly.
Make a controlled trial
Use labeled sample pieces representing both mating edges. Assemble them according to the intended product instructions, without forcing the joint or trimming the tongue to make an incompatible pair appear acceptable. Record the resulting visible joint and back alignment. A sample fit review is useful purchasing evidence, but it is not a connection test.
Carry the match into the order
List the profile drawing revision, approved sample, finished face, end treatment, and required lengths in the release. Ask how short pieces and end matches are identified. If installation will meet a different profile at a border, include a separate transition sketch rather than making that interface the installer's undocumented field decision.
Practical checklist
- Label tongue and groove positions from the visible face.
- Check both face alignment and joint engagement.
- Confirm intended exposure with the project detail.
- Retain paired samples and their identifiers.
Worked example
Hypothetical example: a replacement tongue fits the old groove but leaves the new face proud. The team pauses the order and requests a matching tongue position instead of sanding the installed surface to hide the mismatch.
Limits of this guide
No universal tongue thickness, groove clearance, or installation gap is supplied here. Product geometry, moisture condition, and application matter. A tight hand fit does not prove long-term performance or code compliance.
Continue the decision
Match a replacement profile using a retained sample
Keep face width and installed coverage separate
Build a profile submittal that closes the missing details
Profile explorer